Showing posts with label cards. Show all posts

Sunday, February 1, 2009

In which I have issues

Issue 1: Noro Scarf

My noro scarf is finished.

But, I had issues with my cast on edge. It was floopy and flared and I hated it. If I had taken a picture, you would have hated it too. I decided while I knitted that when I finished I would go back, snip the cast on, unravel the beginning a bit, and then cast off on that end too, since generally speaking my cast offs are much nicer looking than my cast on. (Something about that doesn't sound right, but moving on.)

Well, it turns out that you can't unravel 1x1 rib from that end. It doesn't work. I got out my scissors and cut across the entire cast on row and ended up having to pick all the bits out because there is no unraveling. This was definitely an issue. I pondered what to do about it, and then remembered that I had been on the Yarn Harlot's blog fussing around in the archives because I was bored, and I had read an entry about a crochet cast off. This seemed a promising solution. I was worried that it would be too tight, but it turns out, it was perfect.

IMG_4458-1

I liked it so much that I picked out my original cast-off and did the same on the other end. I photographed it, but it looks exactly the same, so...just picture the above in different colors. Brilliant. I've never had scarf ends look this good. I'm pleased.

Issues resolved. Scarf complete.

IMG_4462

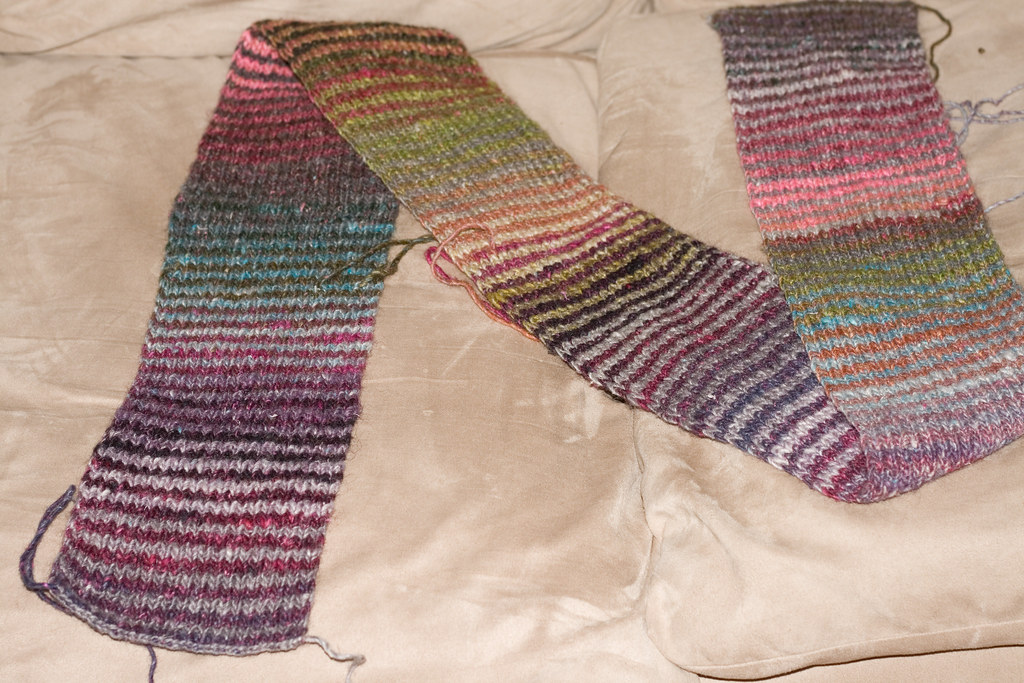
I have to say, I don't like it as much as I thought I would. I mean, it's okay, I don't dislike it, but it's not the best scarf in the history of scarves, period. Also, I have a few million ends to weave in. Several knots and a couple places where the yarn came apart. I got impatient towards the end and just knitted past a couple of knots, but they show and I really should have done it right. But, at least I don't have to weave in those ends. Whatever, I'll weave the ends in during tv time or something.

Issue 2: Tilli Thomas Bag

See previous post re the sillyness of expecting a silky ribbon yarn to hold its shape when wound into a center-pull ball. I got the yarns untangled and rewound, and now the bag is done!

IMG_4452

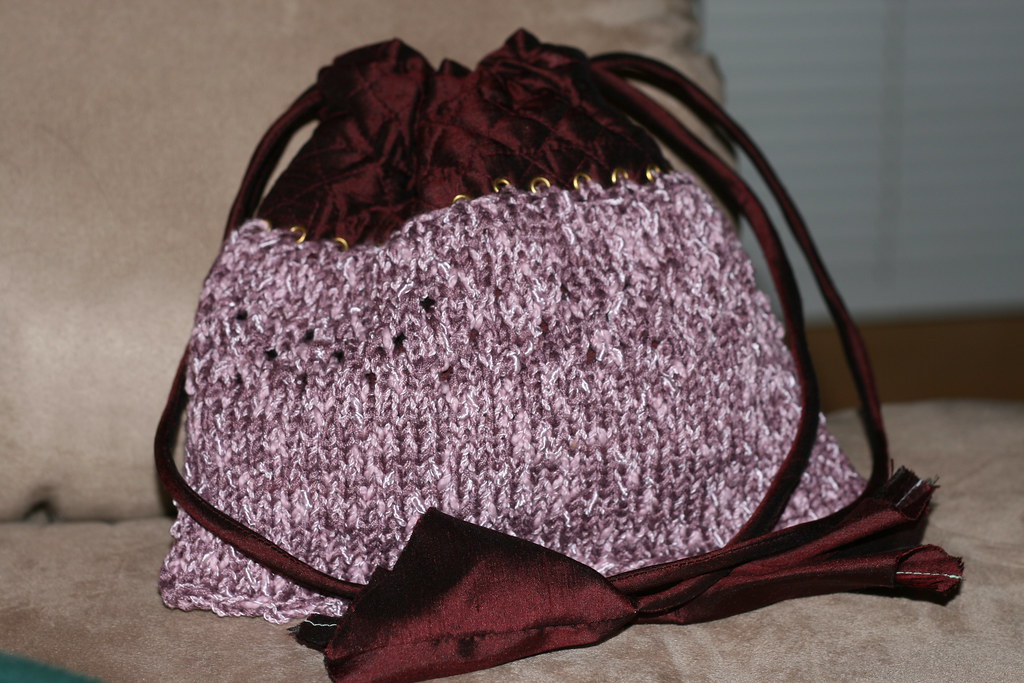
It only took one skein of each yarn after all. I really thought I was going to need more, but nope...one skein knit 1 crochet 2 Souffle, one skein Berocco Glace (I which I believe has been discontinued), with both yarns held together. It doesn't really show in the picture, but I put in three rows of staggered yarn overs in hopes of letting a little more of the red of the bag peak through. In hindsight, I think I would have knitted this at looser gauge, but I think it's really cute as it is.

Issue 3: Caribbean Sock


This sock was great. I love the colorway, the pattern was easy, I managed to cable sock yarn without a cable needle without too much trouble. I was a little concerned about that, because I knit so tightly that my stitches pop down a few rows as soon as I take them off the needle, but it wasn't too big of an issue.

IMG_4467

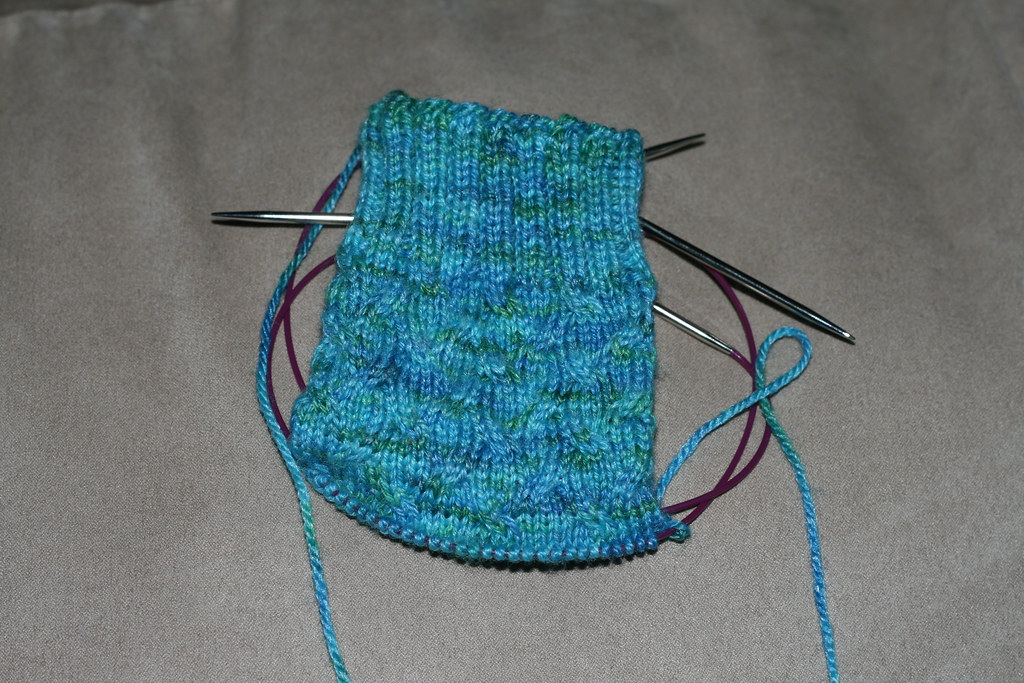
See? Isn't it pretty? Doesn't it look so innocent? I just went happily along, until I decided to try it on and see what kind of length I needed to put on it and then...then I found the issue.

IMG_4475-2

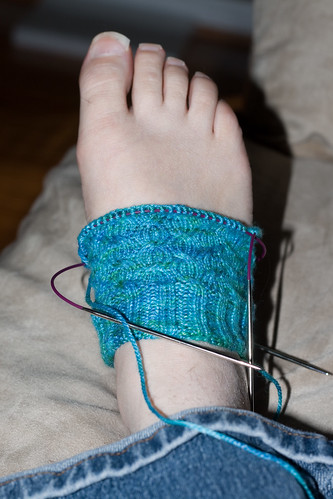
I can't get it any further than that. It's stuck. I'll never be able to get it over my heel. The ribbing's okay, but the cabled stitches don't want to stretch. I got out my needle gauge and used the ruler edge to check my gauge. 10 stitches to the inch - 2 more than the pattern-specified gauge. I'm going to rip it back to the ribbing and reknit on larger needles. However, I also have issues with this plan, because I don't have a pair of number 2 needles free and my 3's are also engaged with the Orchid Mitts.

Issue 4: Cards for savings bonds


My boss gives his grandkids savings bonds for their birthdays, and he often asks me to make cards for them, since his preferred approach of sticking them into a plain white envelope has not been well received in the past. I made these two cards this week:

IMG_4453

IMG_4456

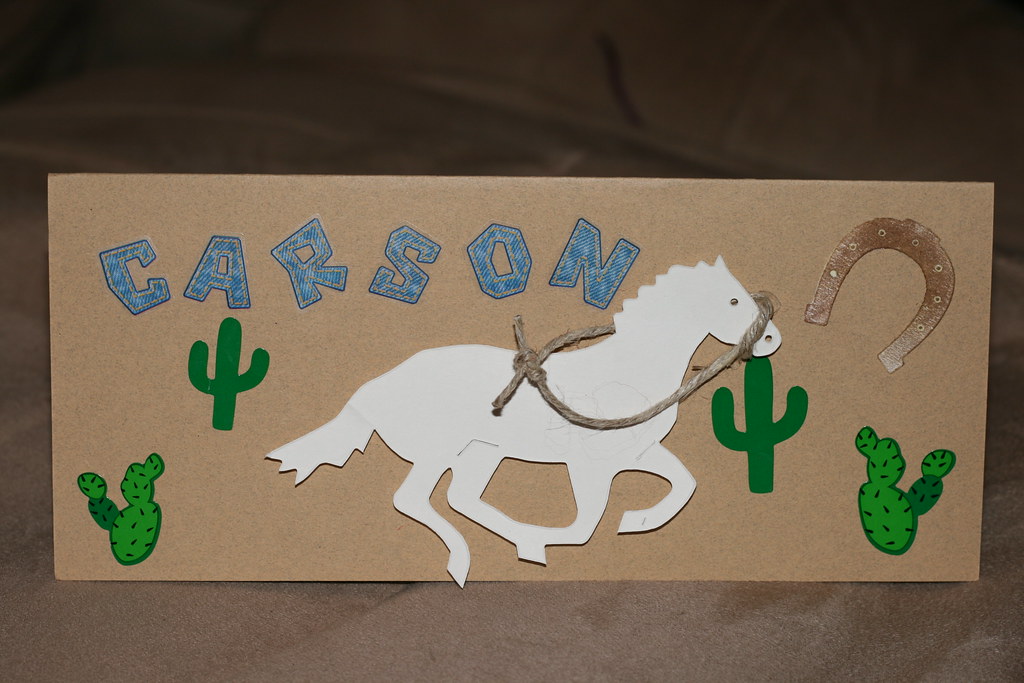
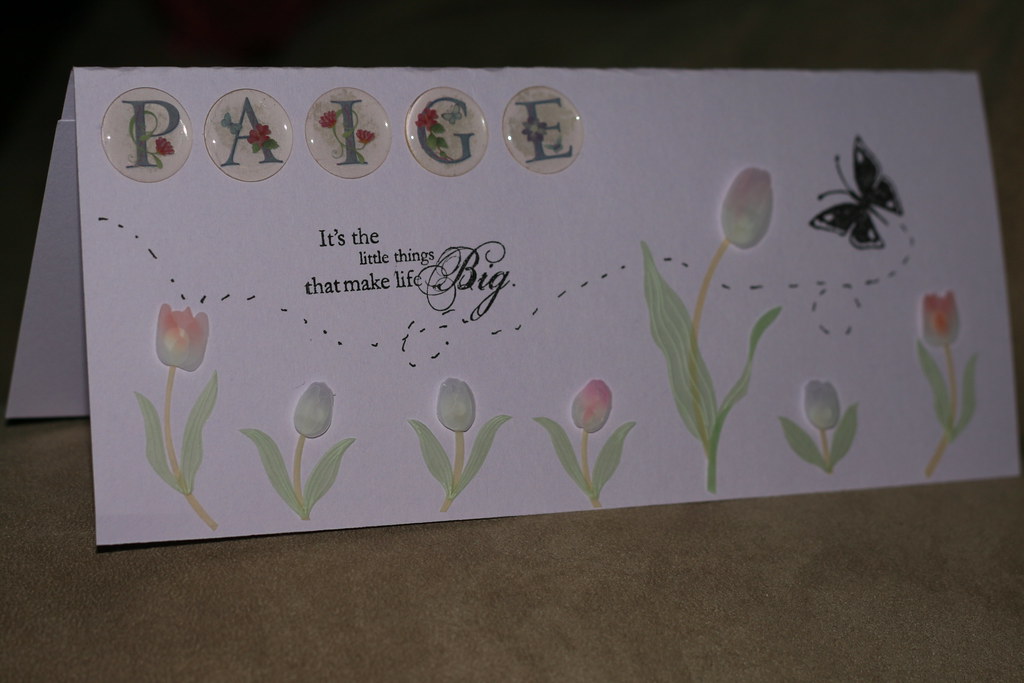
Not bad, eh? So what's the issue?

The issue is that he wanted me to make one for Kennedy, not Paige. -_- So, um...I'll be making another card before this Friday. Two, actually. Then all four grandkids are finished and I don't have to worry about it again for a while.

Issue 4: Orchid Mitts


Click the orchid mitts tag to hear the whole saga of issues. Left on a plane, messed up the thumb gusset, etc etc blah blah. So, this is more of an issue resolution than anything else. I photographed, but it wasn't interesting, so we'll revisit when I finish the rest of the mitt.

Monday, June 2, 2008

Bad Blogger

Argh!! Twice now I have had something non-knitting craft to blog about, and I have failed utterly, becuase I did not have time to take a picture of the result. I made two cards in the past two weeks, one for my friend who was having a baby shower, and one for another church member who had a wedding shower.

For the baby card, I used:

--a pre-made window card from Michael's, the kind that is made for you to slide a picture into, in white, used vertically (with the fold on the left side)
--olive green staz-on ink (it didn't have to be green, that's just what I had in that color)
--Judikins Color Duster
--EK Success water-based brush pens - I don't think they're made anymore
--Stampin' UP stamp from a set called Summer by the Sea (the same one used in the first card on this tutorial, which you totally should go read
--Stamping UP stamp from a set that I think is called "Blessings" - the quote is "It's the little things that make life Big."
--Dye-based black ink
--colored pencils

I tapped the color duster in the staz-on and swirled it around the outside of the frame. I originally planned to stamp the girl and the sentiment on a separate piece of cardstock and slide it in, but I'm not sure whether I did that in the end or not. I used the EK Success pens to ink the stamp of the girl, and then filled it in with colored pencils. I stamped the sentiment in black above her head. I think I used another stamp on the inside of it but I have now totally forgotten what it was.

For the wedding shower stamp, I used:

--A butterfly stamp that I got at Angela's Happy Stamper
--Black dye-based ink
--Another stamp from the Blessings Set, that said something to the effect of "May the God of Love be your eternal partner in your new life together,"
--A Stampin' Up stamp that is the word "love" in very elongated script
--A white pre-made Michael's card (I was in a hurry), used vertically (with the fold on the left side)

I stamped the butterfly in black ink from the left bottom corner to the right top corner, stamping multiple times before reinking so that I had layered butterflies the whole way up, like a flight. I stamped the elongated "love" just above them, following the diagonal of the butterflies. I stamped the sentiment on a white square, which I then matted on a light pink square, which was the only colored piece of the entire card. I put the matted sentiment in the lower right hand corner of the card. Very minimalist, kind of oriental looking to me. I have to admit, though, I totally ripped the idea off one of the cards we did in the Beginning Stamping class at Angela's, with the diagonal butterfly thing. The class card had the butterflies across the diagonal, and then one stamped onto white and matted, and mounted on top of the diagonal butterflies. I loved that card so much I bought the stamp, even though it wasn't in stock and I had to wait months for it. In the end, I did get it. Mwaha. Love it.

In other news, I am up to row 91 on chart 2! (Chart 2 goes from row 51 to row 99). I nearly had a complete meltdown Saturday evening, because while picking back something to see if I had in fact made a mistake, I dropped SEVERAL stitches at the end of the row, in an area full of yarnovers and decreases. I nearly had a heart attack. I put in a lifeline at the beginning of Chart 2, but I really didn't want to lose that much work. I started to try and run another lifeline higher up, but I had a really hard time picking the stitches out. I finally gave up on that and, after much deliberation, I got out a pillow, pinned to the two edge stitches out of the way, and took my needle out of the next six stitches, which covered everything I had dropped. I found the dropped stitches and stabbed through them with blocking pins to keep them from falling any further, until I had a chance to assess the damage. Then I picked a row below them where everything was intact and I could clearly identify each stitch, and stabbed blocking pins through those stitches. Then I took the top set of pins out and carefully pulled out each strand until I had the pinned stitches, and a bunch of loose strands above them. I used a crochet hook to work the next row, unpinning and repinning each stitch as I went across, one at a time. Working this way, I was able to get back up to where I had been, and put the correct number of stitches back on the needle. Only time will tell how I did, but it is looking pretty good so far. I am rediculously pleased with myself.